
How To Set Your ISO
Especially when new to photography the ISO is the one thing that is really confusing everyone. I remember when I started with photography a few years back, I always struggled to set the ISO correctly and often ended up with pictures that were grainy and not very pleasant to look at.
In this blog I will give you a short inside on how to set your ISO and what questions you should ask yourself in the process of doing so,


WHAT ACTUALLY IS THE ISO?
Theoretically the ISO is the best parameter of the so called exposure triangle. which also includes Aperture and Shutter Speed.
Back in the days ISO, which states 'Organisation for Standardisation', was used in film and was an indicator on how light sensitive a film was. Nowadays the ISO is used as a way to determine the light sensitivity of the camera's digital sensor. In most cameras the ISO starts with 100, in some cases also at 50, and extends up to 250.000, depending on the camera. It can be said, that the lower the number, than the less sensitive is your camera to light. This also applies conversely, the higher the ISO number, the more light sensitive the sensor.
WHY DO I NEED TO KNOW ABOUT THE ISO
ISO can be extremely useful in all kinds of different situation, especially when there is a lack of light or in cases where you can't use your flash for the shot, you can just increase the ISO and you'll get the shot you wanted.
As stated above, theoretically the ISO is the best parameter of the three, as you could always get the exposure you wanted without having to worry about blurred images while i.e. taking a shot handheld, but there is one huge downside. Using high ISO creates noise. Just check out the picture below.
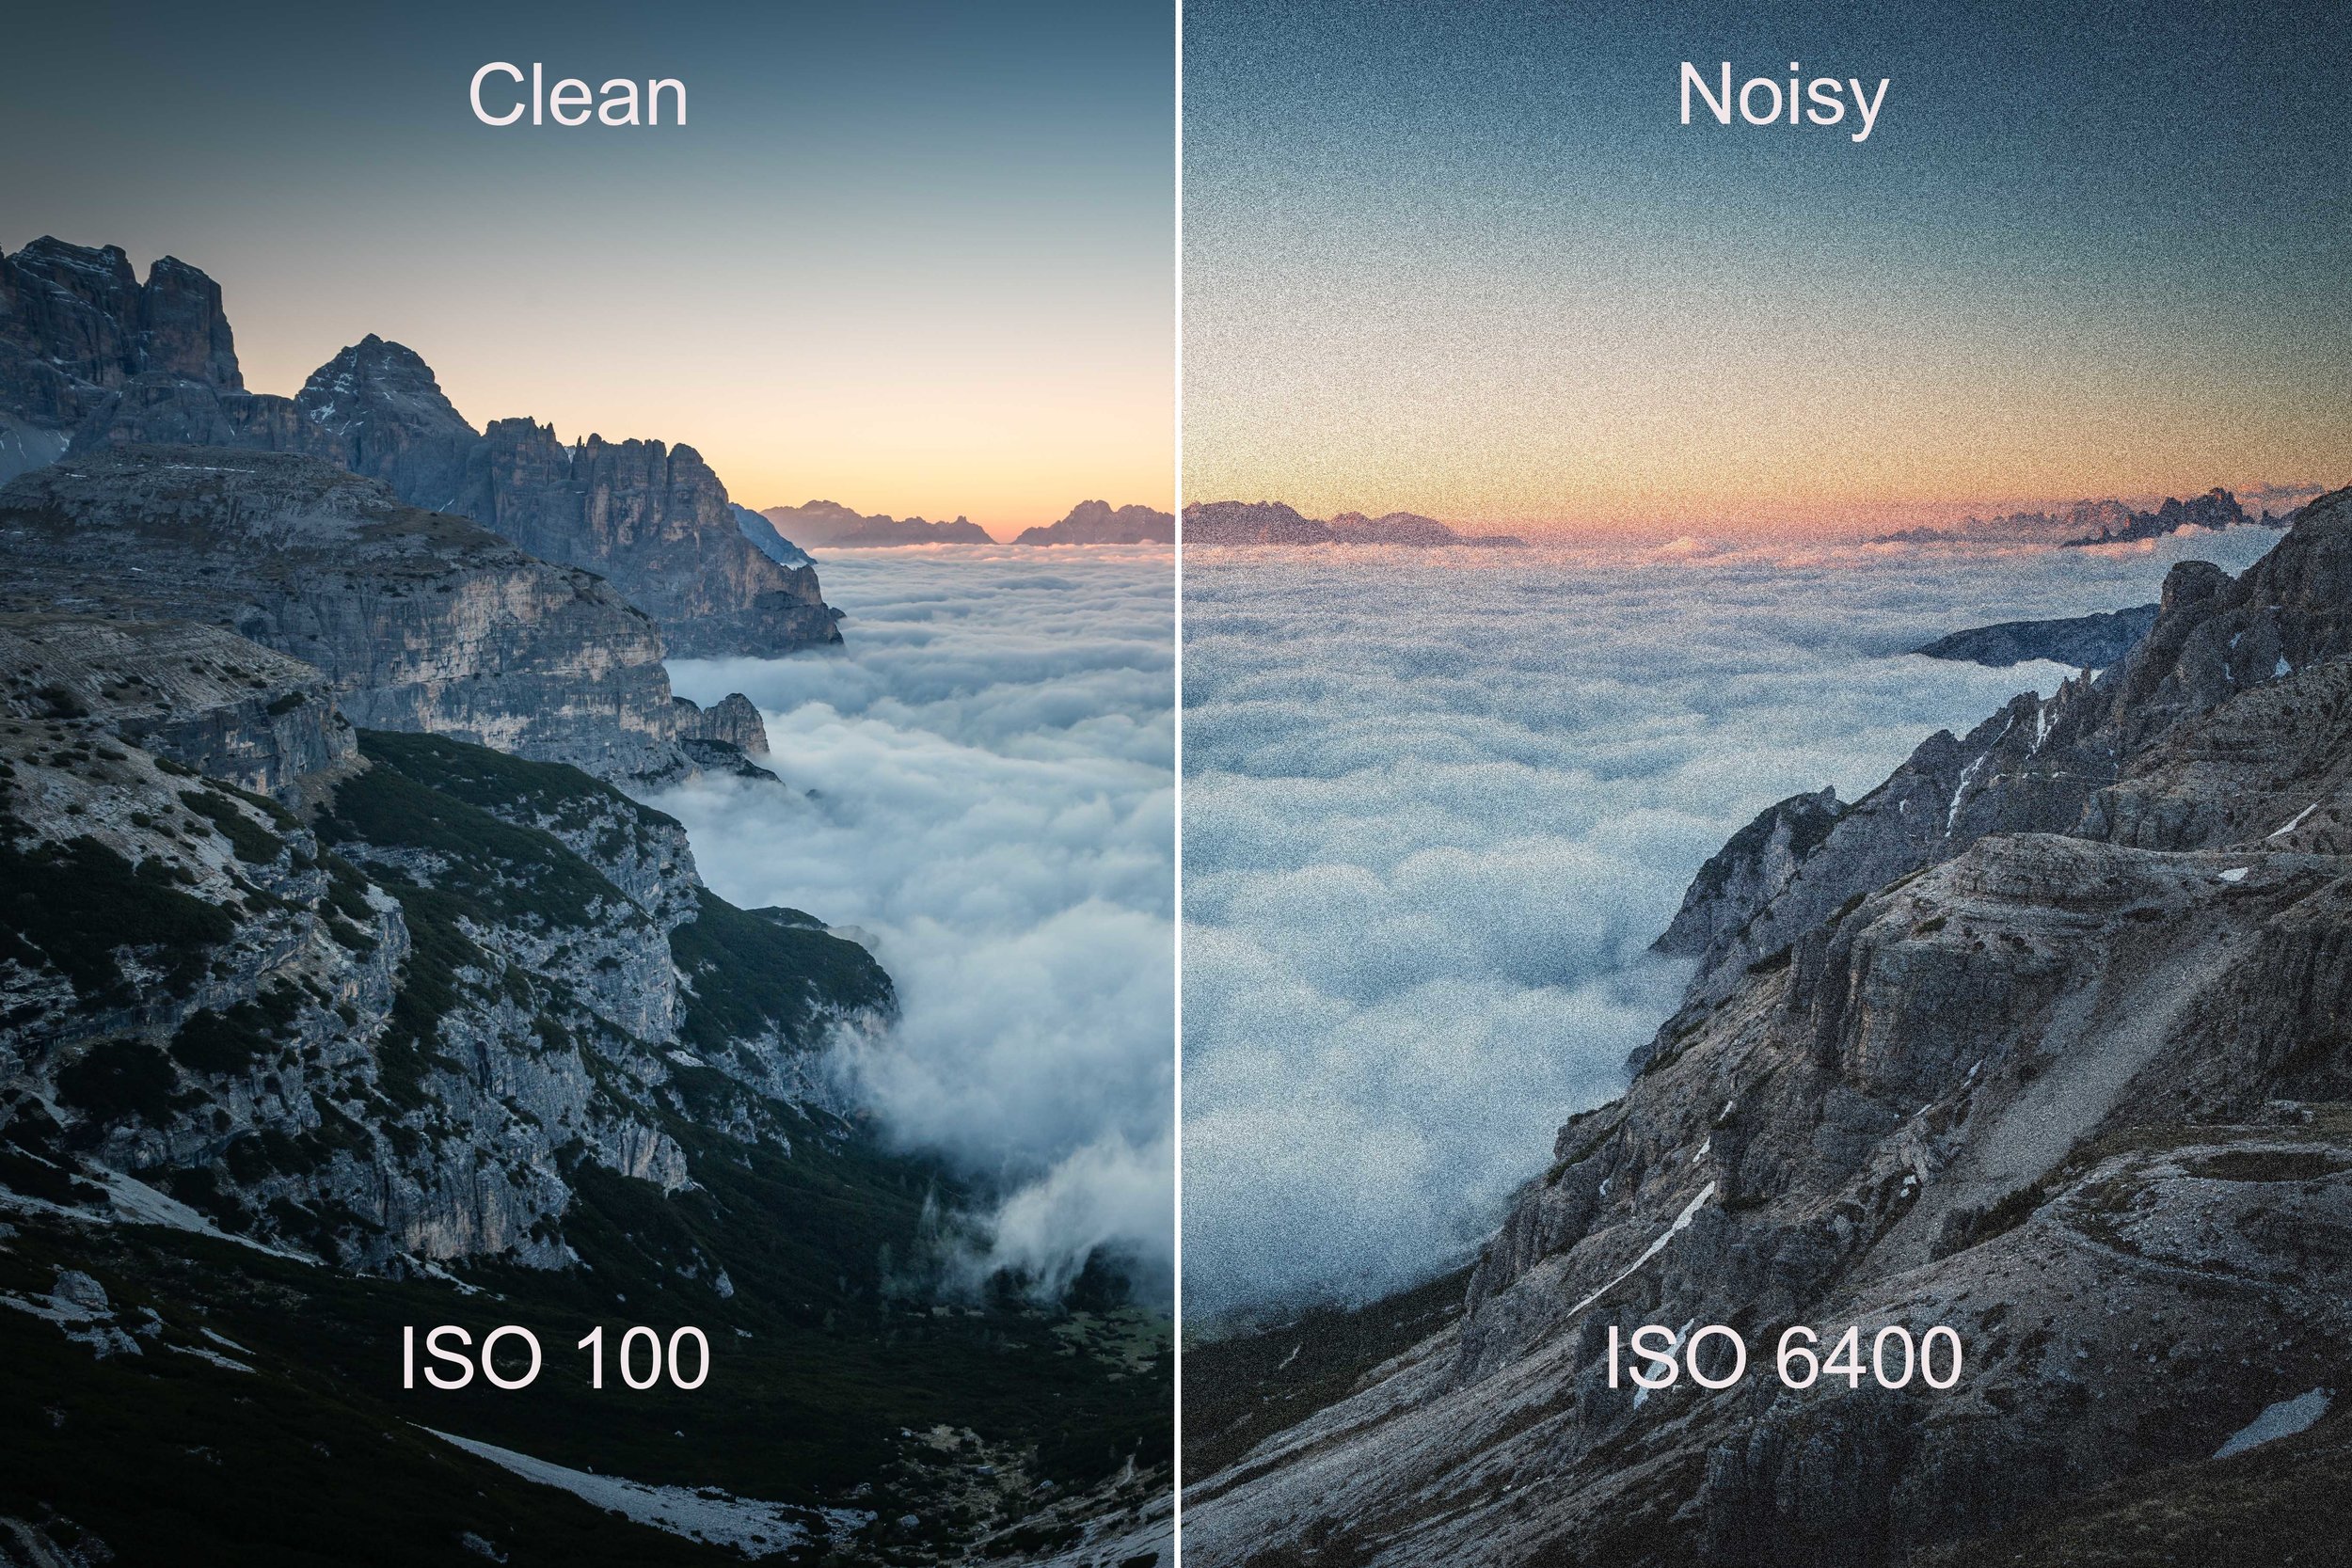
Looking at the picture, you will quickly find, that the right side doesn't look any good. Generally we can say, that you should always aim to set your ISO as low as possible, unless you want your images to look moody and grainy of course.
WHAT QUESTIONS SHOULD YOU ASK YOURSELF BEFORE SETTING THE ISO?
(Content Inspired by Darren Rowse)
There is many question you can ask yourself before setting the ISO of your camera. Down below are some of these, which I am always asking myself before taking a shot.
IS MY OBJECT STILL OR IS IT MOVING?
The fact that an object or a person is is still or moving can make a huge impact on how you set up your ISO. Especially if it is still and you are shooting on a tripod, you can lower your ISO down all the way and rather decrease your shutter speed instead.
SHALLOW DEPTH OF FIELD OR DEEP DEPTH OF FIELD?
Do you want to have the whole image in focus and sharp or do you want out of focus areas/seperate foreground and background. Especially if you don't need a sharp and in focus image through out, you could really consider lowering your f-stop instead.
CAN I USE A LIGHT SOURCE?
You should always ask yourself, if you can use a light source to light your scene in order to reduce the ISO. When indoors, you could for example just turn on the light or when shooting outside you could take flashlight (I always carry around 3 flashlights for my night-photography)
DO YOU WANT TO PRINT YOUR IMAGES BIG?
If you wish to print your images large, then a noisy image is no good. If your only shooting for instagram or facebook, your images will only be displayed very small and you will most likely even get away with a very noise image.
AM I SHOOTING HANDHELD?
Last but not least, the most important question you will have to ask yourself! If you are shooing handheld in a bad light situation, there is almost no way around using a high ISO. On the other side, when shooting on a tripod you can happily drop the ISO down all the way.
HOW POST PROCESSING CAN HELP YOU OUT?
These days, there is a lot of great software around and almost every photo editing program has the ability to identify and remove noise.
To showcase this, I have used the same picture as above and just imported it into Lightroom and pushed the Noise Reduction to 100%. Check it out below. Click to enlargefor better detail!!


As you can see, Lightroom did a great job at making the picture a little more pleasant to look at. Even though image quality decreased a little, I personally think this image looks way better now and I wouldn't hesitate a second to post this on my instagram.
----
Was this helpful to you? Are you still confused? Leave me a comment down below!